Using React and Carbon Components
This tutorial walks through how to create an application using v2 of the QRadar App SDK, React, and Carbon components. It is a companion to the full Carbon components sample to more fully explain how to set up a project with this structure. You can see the full CarbonComponents sample app in the QRadar Sample Apps repository on GitHub.
Objectives
By the end of this tutorial, you should have a basic React application with one Carbon Component. A production build of this React application will be served by a Flask webserver that was generated using the QRadar App SDK. The tutorial also explains how to package and deploy the application to a QRadar console.
Prerequisites
- Python 3 and pip to download required Python modules.
- Docker to download required Red Hat RPMs.
- QRadar App SDK v2 to run apps locally and to deploy to a QRadar system.
- Node >= 10.16 and npm >= 5.6 to generate the React app used for the front end.
Creating the QRadar application
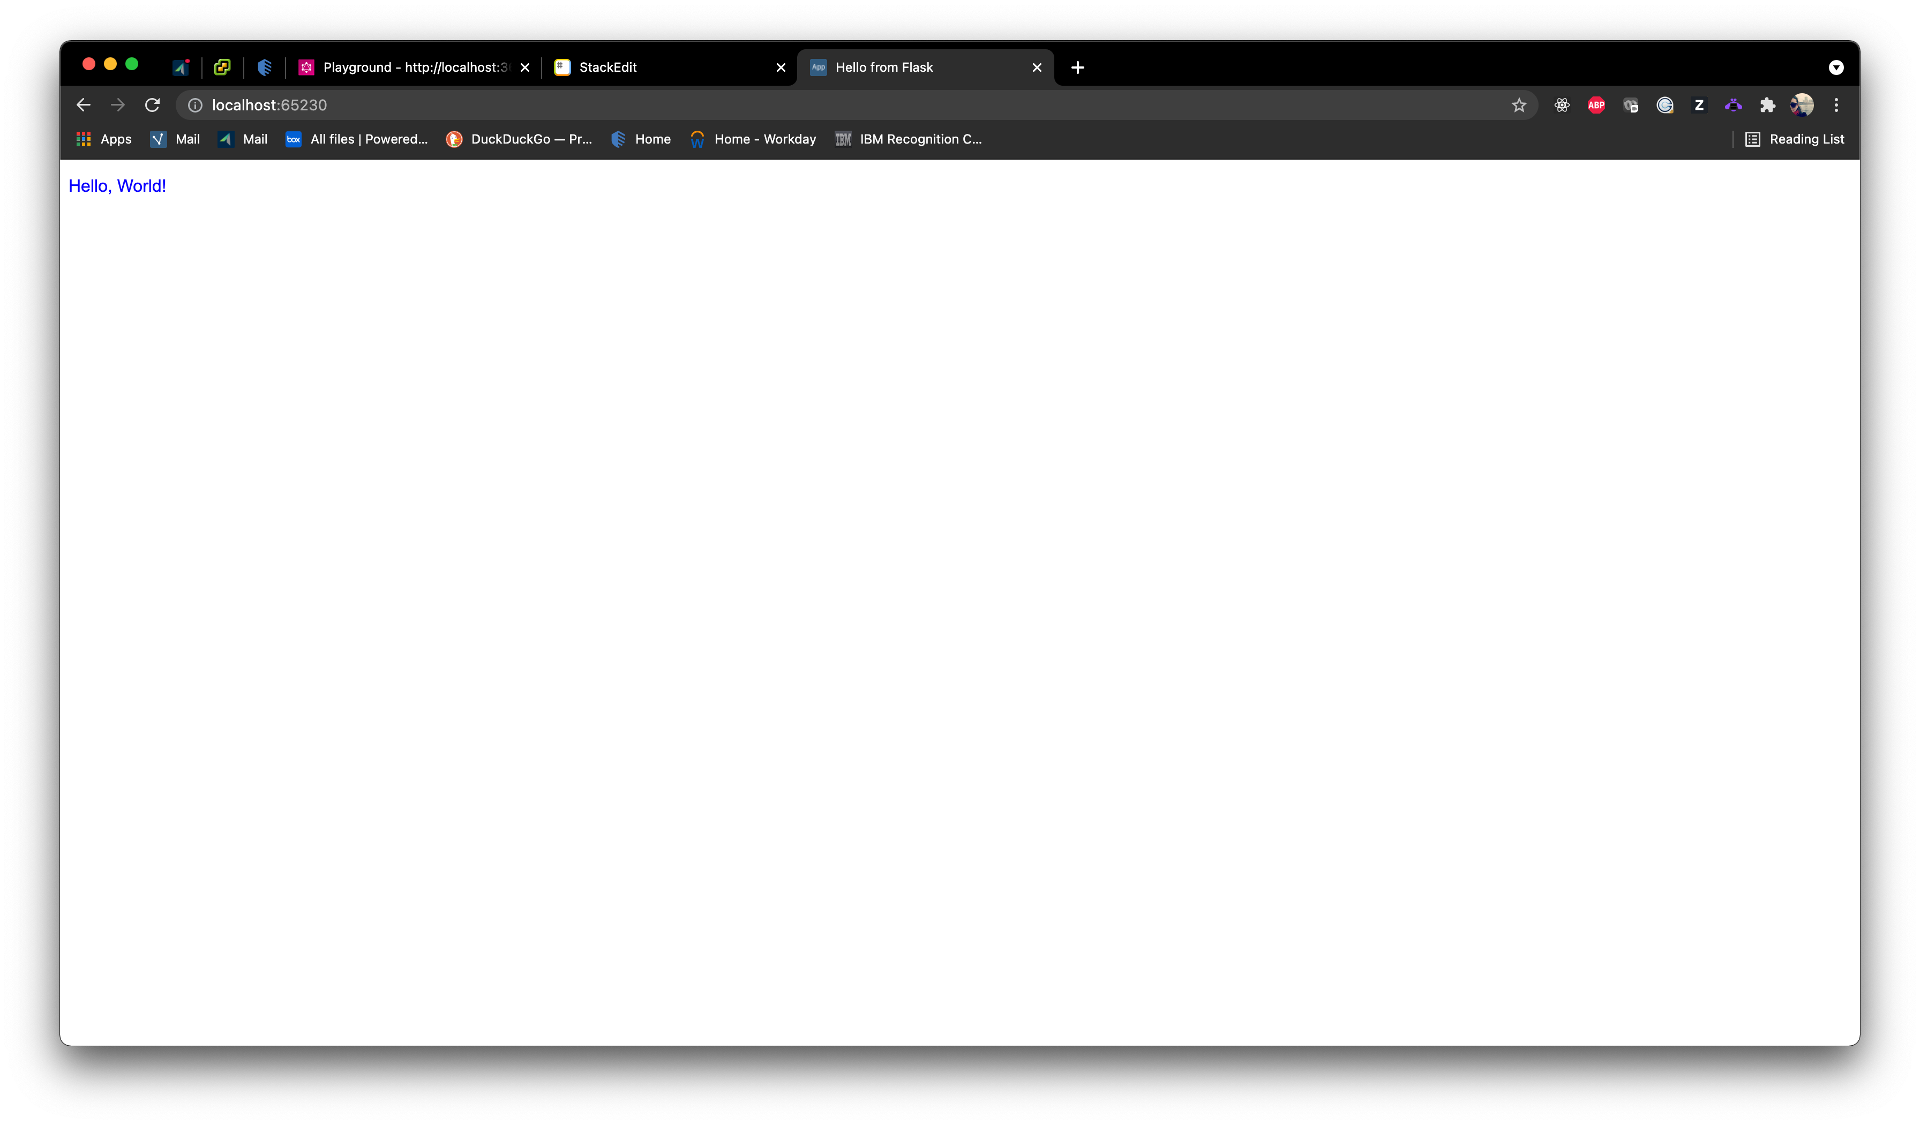
The SDK comes with a command to autogenerate a Flask application that can be deployed to QRadar out of the box. First, we create one of these apps.
Create a new directory for your application to live in. Then, in that directory, run the following command:
qapp create
These generated apps can be run locally inside a Docker container. Run the following command to both build a Docker image for your app and start a container using that image:
qapp run
Copy the localhost link output to the terminal and open it in a browser. You should see a page with the words “Hello, World!”.
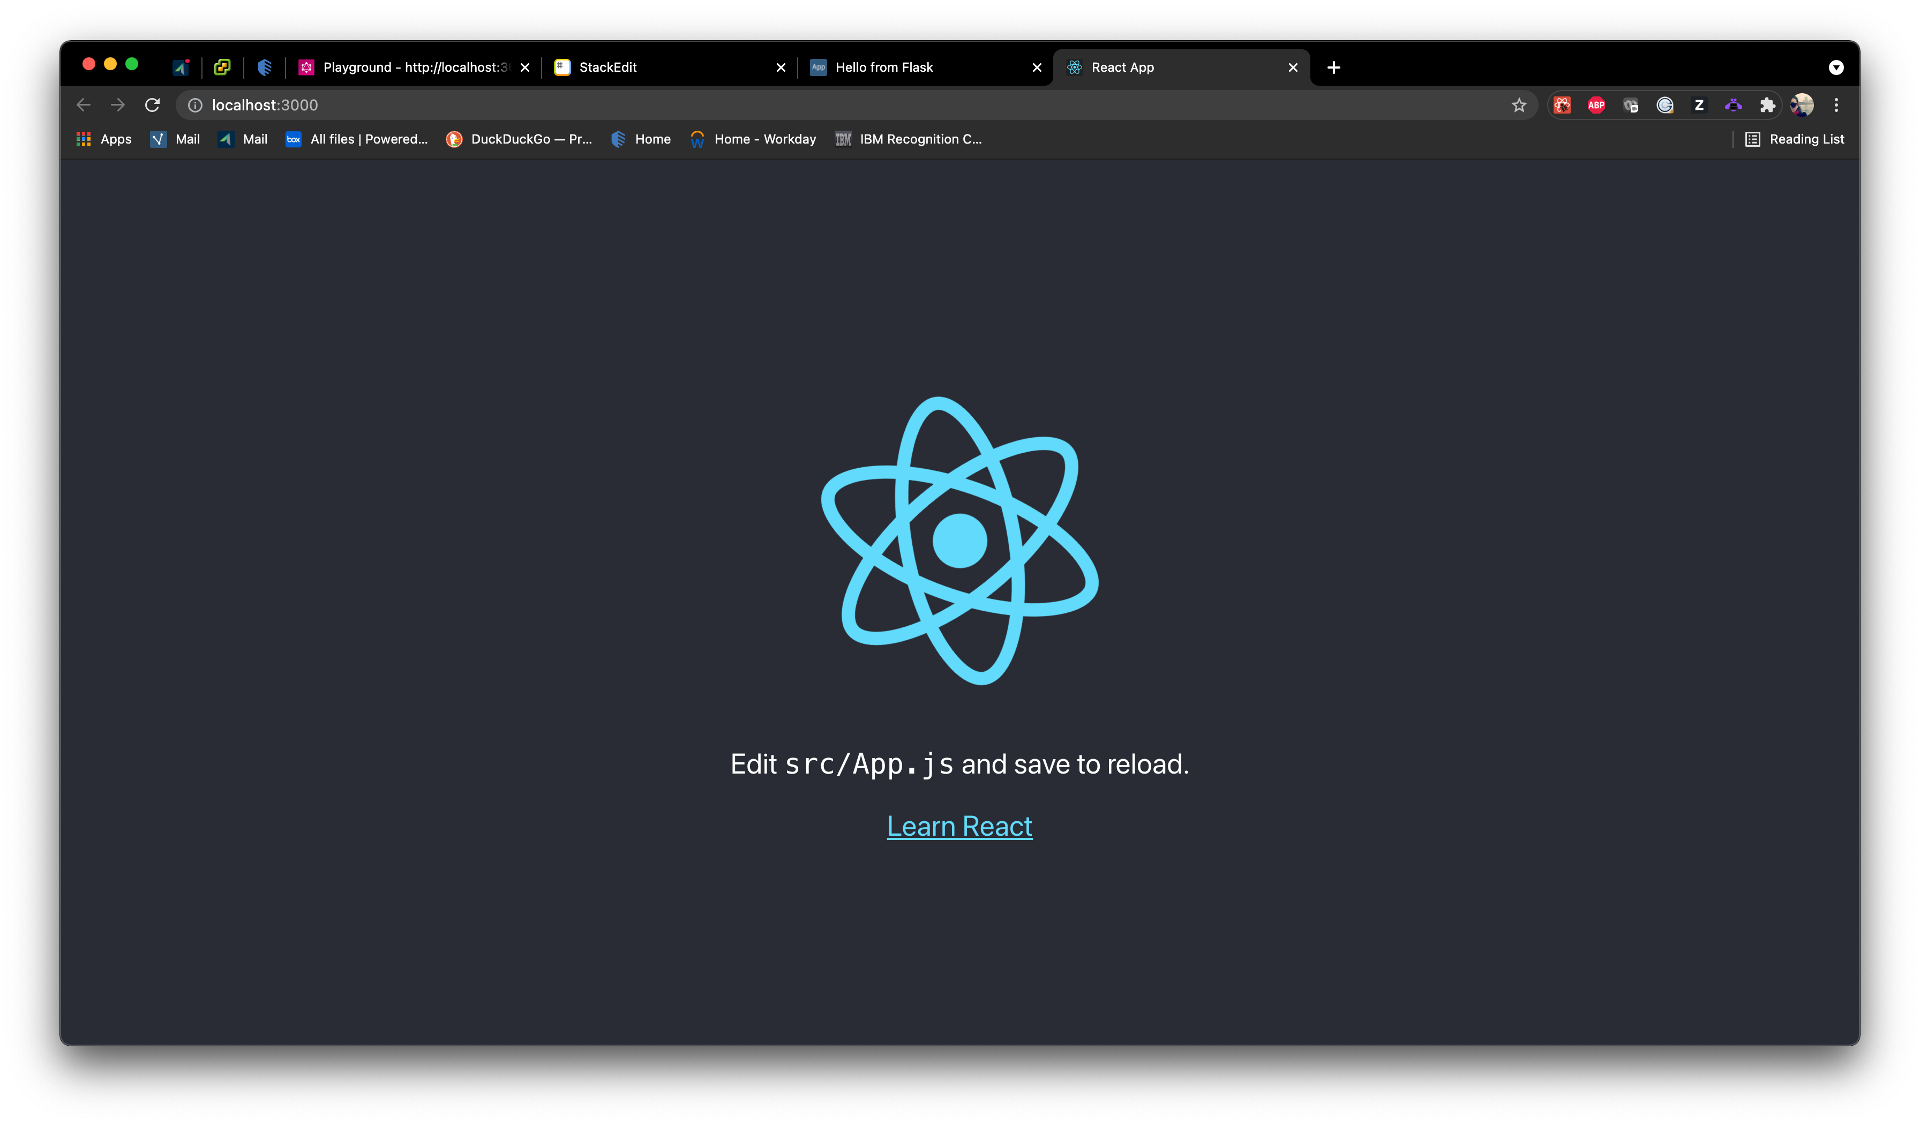
Creating the React application
Use Create React App to generate the React application to serve as the front end of this app. While still in the root directory, run the following command:
npx create-react-app react-ui
Note: npx is not a typo, it’s a package runner tool that comes with npm 5.2+.
It might take a minute or two to generate the React app and install all the necessary dependencies. When it’s finished, all the application code can be found in a new react-ui directory.
To launch the application locally, navigate into the react-ui directory and run the following command:
yarn start
The application starts up on localhost:3000.
Installing front-end dependencies
Next, we install all the necessary dependencies for the React app.
There are several different packages that make up Carbon, and you can add or remove them as you need them. Add the following packages to start off with:
carbon-components-reactA collection of Carbon components built in React;@carbon/ibm-securityAn extension of Carbon that includes more components commonly used by offerings in the IBM Security organisation;@carbon/colorsThe predefined colour schemes used by Carbon;@carbon/icons-reactA set of Carbon icons that can be imported and used as React components.
Install all of these by running the following command in the react-ui directory:
yarn add carbon-components-react @carbon/ibm-security @carbon/colors @carbon/icons-react
All of the Carbon components are styled using SCSS, so we also need to add the node-sass package to support that:
yarn add node-sass
Finally, we need to install axios, a promise based HTTP client that will be used in the front-end to make requests for data from the Flask webserver:
yarn add axios
Convert existing CSS files to SCSS
Before going any further, we need to confirm that SCSS has been installed correctly, and that the React application still works as expected.
The React app should only have two CSS files at this stage: src/App.css and src/index.css. To convert these files to SCSS, simply update the file extensions to .scss instead.
Remember to update the import statements in src/App.js and src/index.js to match the new names of the files:
/* in App.js */
import  './App.scss'
/* in index.js */
import  './index.scss'
Refresh/restart the React application and confirm that it still loads as expected.
Getting Flask to serve the React app
As mentioned at the beginning of this tutorial, the end goal is to have a Flask application that serves a production build of a React application that we can deploy to QRadar. To achieve this, we need to be able to customise the build process to ensure that the resultant files can be found by QRadar once the app is deployed.
Create React App hides most of the configuration files that dictate where the application is built to. We can get access to these files by ejecting the React application.
Justification for ejecting
Ejecting a Create React App application is often discouraged, as it’s a one-way operation that exposes a lot that’s going on behind the scenes of the relatively simply app that was generated. However, once we have access to the hidden configuration files, we can specify exactly where the app is built to, as well as specify the paths for the minified js and css files. This is important as we need to make sure that, once our application is deployed to QRadar, these files are served from a place that QRadar can find.
Running the eject command
To eject the React app, run the following command:
yarn eject
Once this process has finished, you’ll notice a new config folder in the root directory of the React app. It’s the files in this folder that we need to update to ensure that the production build of the React app will cooperate with QRadar once it’s deployed.
There are a few updates to make; let’s go through them step by step:
- In
react-ui/config/paths.js, there is abuildPathvariable that dictates where the production build ends up. The build will need to be somewhere in theappdirectory of the project, so that it gets included in the package that gets deployed to QRadar. Update this variable to the following:
const buildPath = '../app/static/react';
- Open
webpack.config.js, found in theconfigdirectory. Among other things, this file dictates the names of the minified css and js files that are generated as part of the build process. By default, these names are prefaced withstatic/. We need to update this, otherwise our files will be written toapp/static/react/static. Do a find and replace forstatic/and remove it from all filepaths. For example:
/* before */
filename:  isEnvProduction
	? 'static/js/[name].[contenthash:8].js'
	: isEnvDevelopment && 'static/js/bundle.js',

/* after */
filename:  isEnvProduction
	? 'js/[name].[contenthash:8].js'
	: isEnvDevelopment && 'js/bundle.js',
- Still in
webpack.config.js, find where theHtmlWebpackPluginobject is initialised. Here we’re going to add afilenamefield to specify that the compiledindex.htmlfile is written to the templates directory of the Flask app:
new  HtmlWebpackPlugin(
	Object.assign(
		{},
		{
			inject:  true,
			template:  paths.appHtml,
			filename:  "../../templates/index.html",
		},
		/* some additional code that doesn't need updated */
	)
);
- In the
package.jsonof the React app, add ahomepagefield and set it equal to./static/react. This is important because by default, Create React App produces a build assuming that the app will be hosted at the server root.
"homepage": "./static/react",
Building the React app
Do a production build of the React application by running the following command in the react-ui directory:
yarn build
Once that completes, you should notice that a new react directory has been created in app/static that contains all of the resultant build files. There should also be a new index.html file in the app/templates directory.
Updating the Flask app
Now that the React app has been built to the correct location, we need to update the Flask app to ensure it serves the build.
Open views.py and replace its contents with the following:
from flask import Blueprint, render_template

# pylint: disable=invalid-name
viewsbp = Blueprint('viewsbp', __name__, url_prefix='/')

@viewsbp.route('/')
@viewsbp.route('/index')
def  index():
	return render_template('index.html')
This will serve the index.html file that was produced by the React build.
Delete the hello.py template file that was previously being served, as it’s no longer needed.
Moment of truth
Run the following commands from the root of the application to clean up the existing Docker container and image for the application and spin up new ones:
qapp clean -i
qapp run
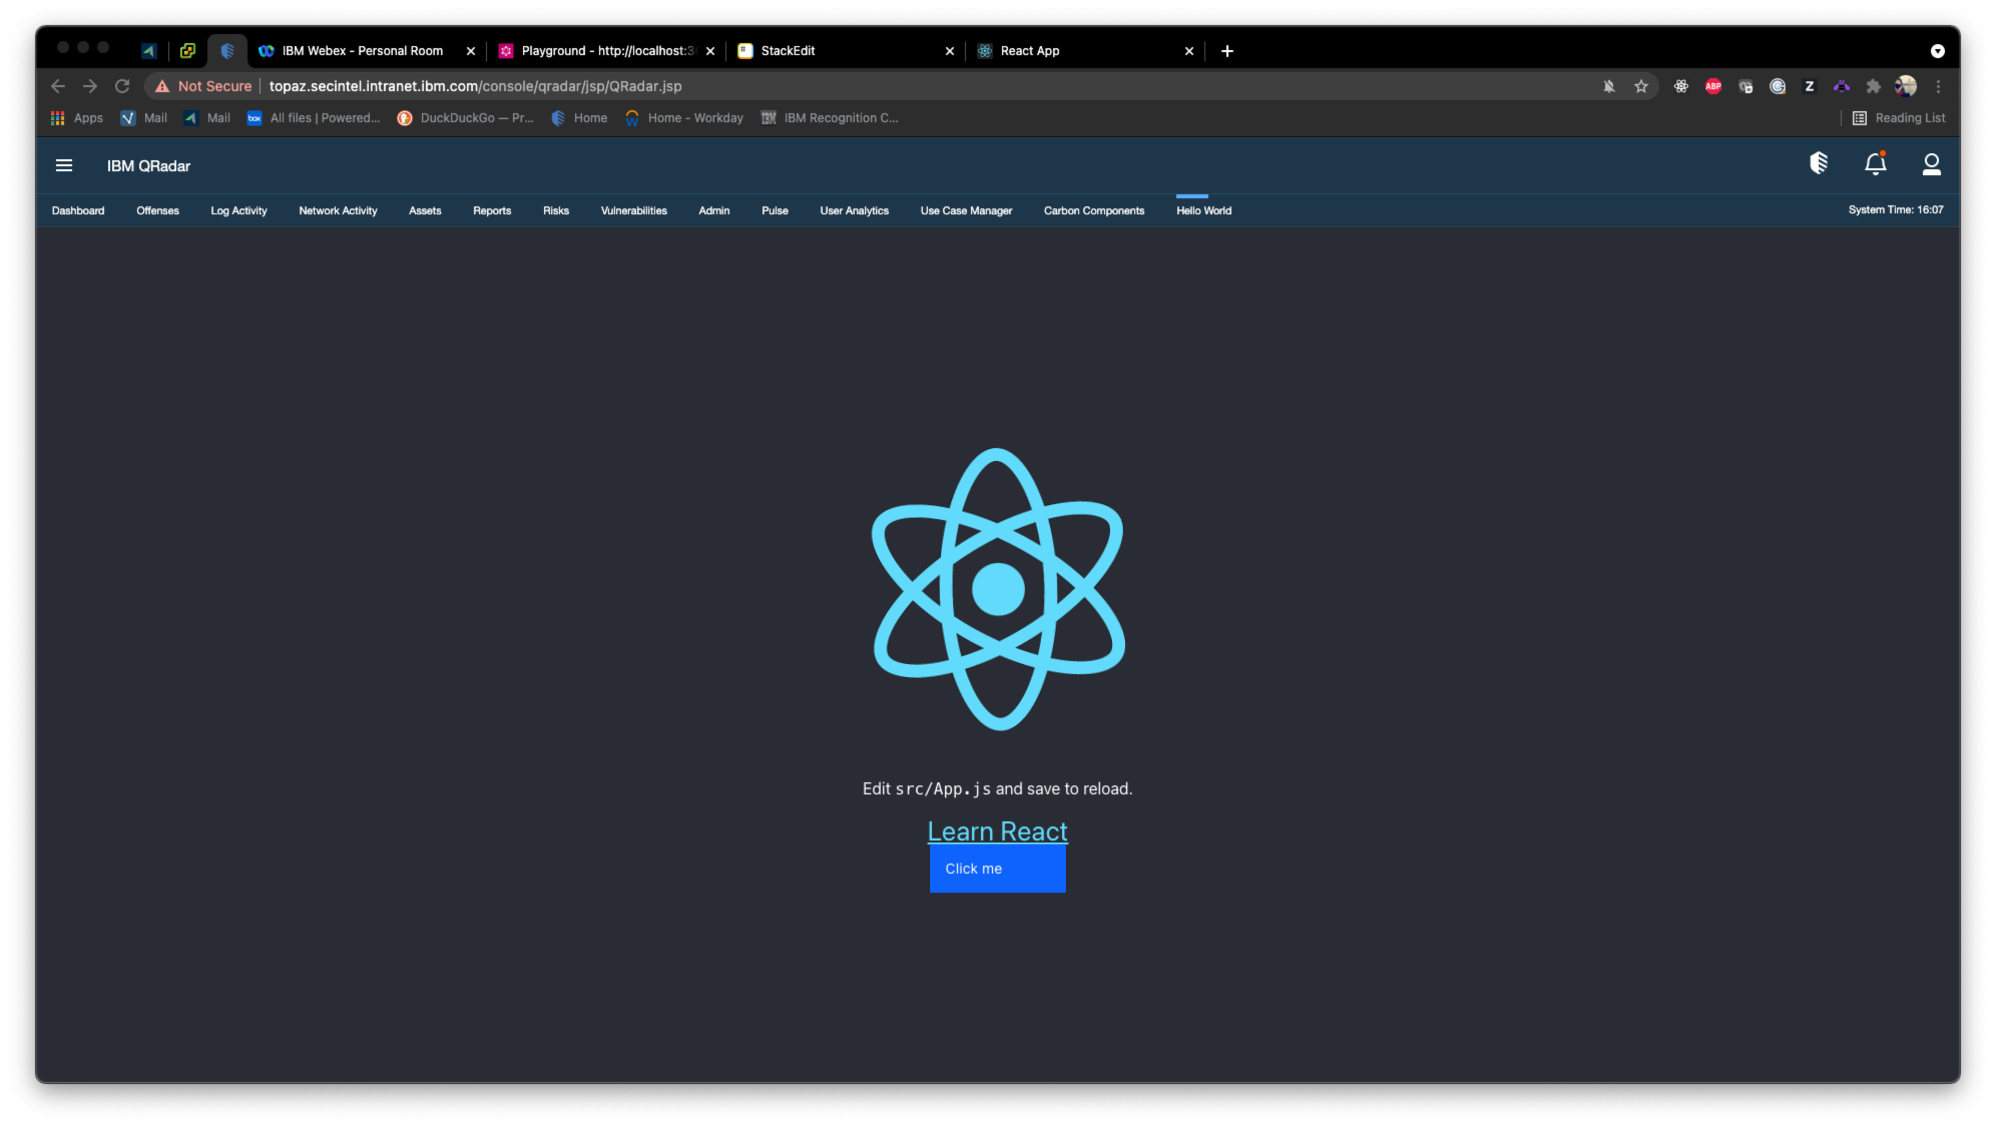
Navigate to the localhost URL that is output in the terminal. If everything is set up correctly, you should see the same React page as before in Step 2, but now it’s being served by Flask.
Bringing in Carbon components
Now that the hard part is over, we can concentrate on bringing some Carbon components into our app. For the purposes of this tutorial, we’re just going to bring in the one component to confirm that everything is imported and working as expected. The full sample application demonstrates how to import and use around 10 different Carbon components; refer to that for some more examples.
The Carbon component we’re going to use is the Button component. We’ll add the button at the bottom of the page that’s currently being served by the Flask app.
Open App.js and update it with the following:
import { Button } from  '@carbon/ibm-security';
import  logo  from  './logo.svg';
import  './App.scss';

function  App() {
	return (
		<div  className="App">
			<header  className="App-header">
				<img  src={logo}  className="App-logo"  alt="logo"  />
				<p>
					Edit <code>src/App.js</code> and save to reload.
				</p>
				<a
					className="App-link"
					href="https://reactjs.org"
					target="_blank"
					rel="noopener noreferrer"
				>
					Learn React
				</a>
				<Button>Click me</Button>
			</header>
		</div>
	);
}
export default App;
Note that we imported the Button at the top of the file, and then called it in the render function.
To see these changes, we need to do a fresh production build of the React app for the Flask app to serve. Run the commands below:
cd react-ui && yarn build
cd ..
qapp clean -i
qapp run
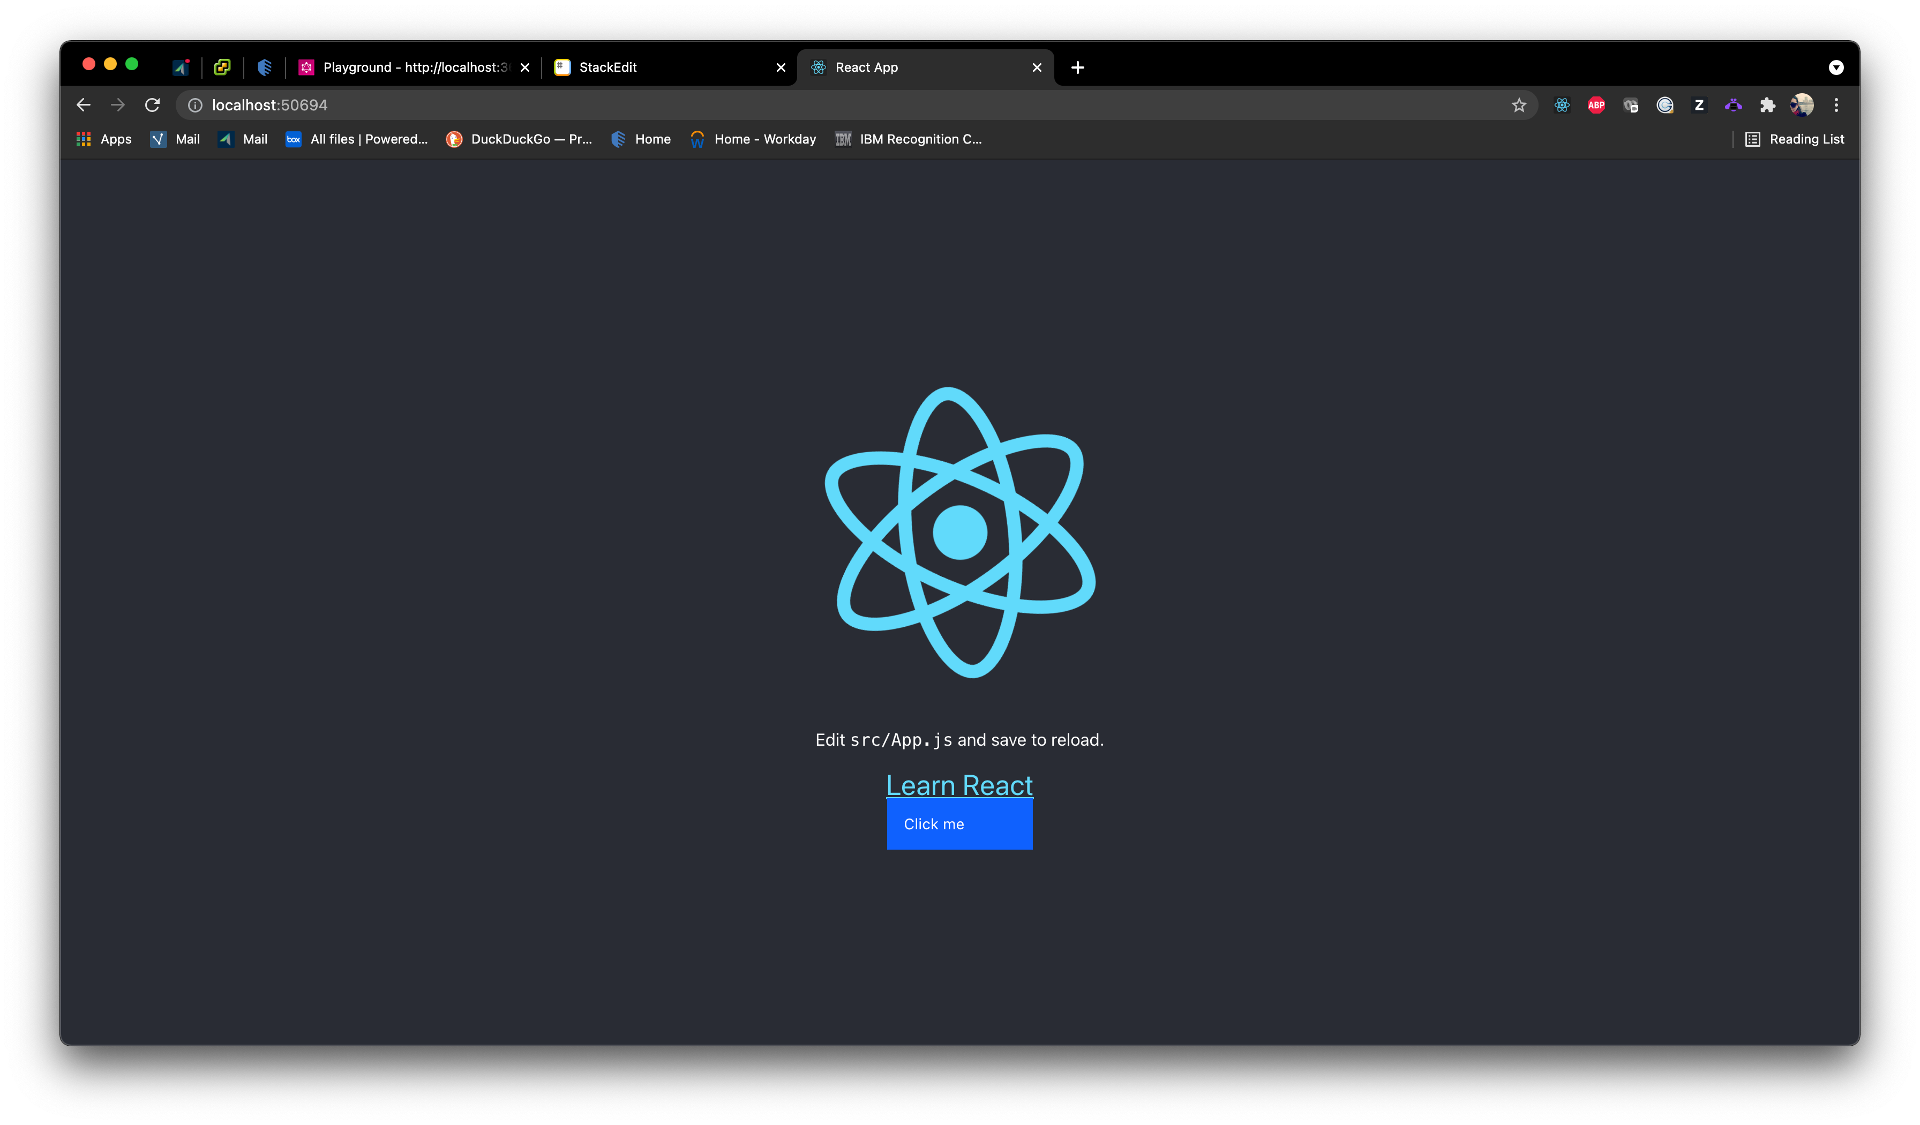
Navigate to the localhost link that is output in the terminal, and you’ll notice that, even though a button has appeared underneath the “Learn React” link, it doesn’t look like a Carbon button.
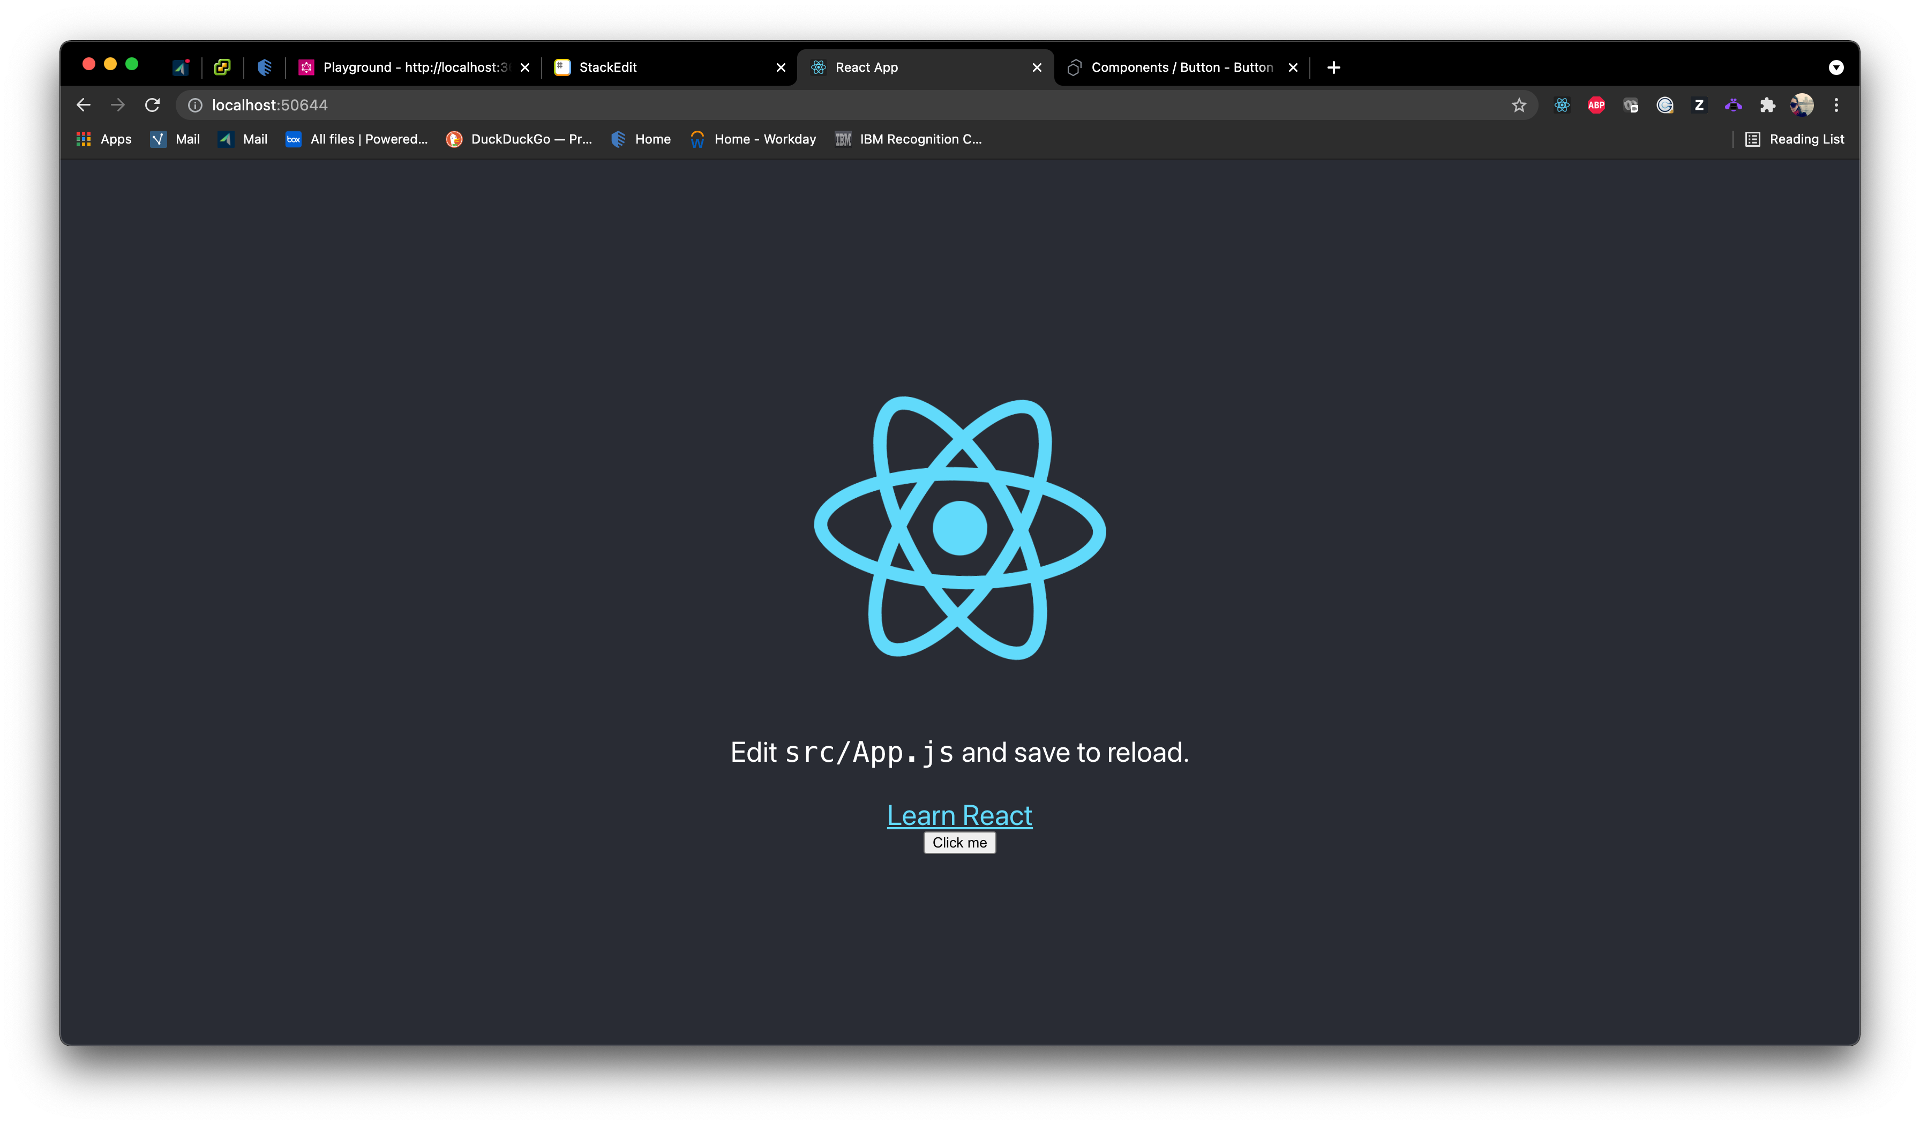
We still need to import the Carbon SCSS so that our components will show up as expected.
Open index.scss and add the following line at the top of the file:
@import '@carbon/ibm-security/css/index.min.css';
Rebuild the React app and spin up the Docker container again. You should now see the Button with the Carbon styling applied.
Deploying to QRadar
In order to deploy our application to a QRadar console instance, we must first package it into an appropriate format. QRadar application packages must contain the following 3 things:
- An
appfolder; - A
containerfolder; - A
manifest.jsonfile.
We could just compress the root folder of our application and deploy the whole thing. However, we want to keep the package as slim as possible to help with performance and deployment times. Because the Flask server serves a production build of the React app, there’s no need to include the source code or any of its dependencies. Thanks to the changes we made when ejecting the React app in Step 5, everything we need has already been compiled into app/static/react.
From the root directory of the application, run the commands below to generate a fresh build of the React app and compress only the essential files into an app.zip package.
cd react-ui && yarn build
cd ..
zip app.zip -r app container manifest.json
After the package file is created, use the following command to deploy it:
qapp deploy -p app.zip -q <qradar console ip> -u <qradar user>
If this is your first time deploying to this QRadar system, you’ll be asked if you’d like to download a CA certificate bundle. This is one-time download per system and is used for authentication. Click Yes, answer the following prompts according to your own QRadar set up, and wait for the application to be created.
When it’s finished, refresh your QRadar console, and you should see a new tab called “Hello World.”

Click on this tab, and you should see the React page.